So, today I went to
Birth, Baby and Beyond in downtown Cedar Rapids and looked at cloth diaper systems. It's overwhelming, but I would really like to try cloth/reusable diapers. Not only is it environmentally conscious, it's also very cost-effective.
The benefits of cloth-diapering (visit
Ecocheapmom for more information)
1. Saving money (According to some estimates, you can save $1,200 year)
2. Better for baby (Most disposable diapers contain toxins that can cause cancer)
3. Better for the environment (Disposable diapers end up in the land-fill and no one knows exactly how long they take to decompose)
The cloth diapering systems that I am going to be trying out are:
Flip diaper system, (a 2 piece system that is one-size fits all) which allows for the use of many different kinds of inserts...disposables for "on-the-go," hemp for super absorbancy, stay-dry and organic inserts (which come with the system), regular pre-folds for cost effectiveness and the flip diaper cover can be used over all-in-one systems to protect baby's clothes from leaks.
Bamboozle by Bummis, (a 2 piece system that comes in 2 sizes) which is a stretch bamboo diaper with SUPER absorbancy. You can use a flip diaper system cover over this diaper (for prettiness and to prevent leaks).
Bummis all-in-one system (an all-in-one system that is one size fits all). It's super easy to use since there are not 2 pieces...you just put the diaper on and go, just like with disposables. Also, the liner has 2 layers and there is an option to add more absorbancy into "the pocket" if needed. *This is probably going to be what Austin will use because it's pretty self-explanatory...
This afternoon I spent some time doing research on what things we would need...wet bags, cloth diapers, cloth wipe solution etc.. At the BB&B store you could spend big bucks on "designer" supplies for your cloth diapering system, but one of the main reasons that I am pursuing cloth diapering is for the money savings, so...my first DIY projects: cloth wipes and a wet bag to carry in my diaper bag.
I started with the easiest project: cloth wipes.
Reusable Cloth Diaper Wipes
You need:
8" x 8" pieces of fabric (cotton, flannel or bamboo)
Sissors, pins
Sewing machine or serger

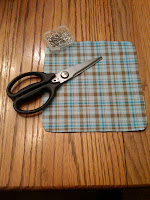
*I made an 8"x8" "pattern" with rounded edges out of an old cereal box. Then I laid my flannel and 100% cotton fabrics together, right sides out and cut them out with my pattern. I used a zig-zag stitch to sew them together and then I just trimmed up the edges to make them nice 'n pretty (Because something that's gonna wipe my kids' butt has to be nice and pretty!)
And the final product!
The next thing I made was a "wet bag." The wet bag has many functions- it can hold wet swimsuits, soiled clothes...anything wet or dirty that you don't want to touch clean stuff. My wet bag is for soiled diapers and clothes and I will carry it around in my diaper bag. This project was a little more time-consuming and I made a few minor mistakes and learned alot...now I can't wait to make another, and perhaps a makeup bag as well!
Since the "wet bag" project was a little more advanced and I made a few "oopsies" along the way, I will just post a few pictures of the project and will include DIY instructions later...after I've tried the project again.
But here it is: my first zippered project!
Medium-sized zippered wet bag
You need:
Decorative fabric (at least 12" x 14")
Vinyl or other waterproof fabric (cut to the same dimensions as your decorative fabric)
Zipper (a few inches longer then the width of your fabric)
Sewing machine, pins, sissors etc...
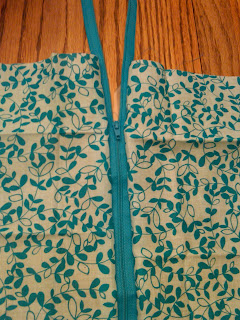 |
| I figured out how to sew the pieces of vinyl and fabric to the zipper correctly the first time. Doesn't it look nice? |
 |
| I stitched up the sides and bottom of the vinyl and fabric seperately and that's where I ran into some trouble... |
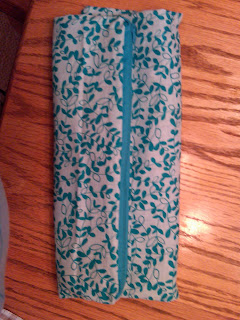 |
| ...but I still managed to MacGyver it. And it's fully functional and SUPER cute! |


